I am a scientist who loves to cook because there are many similarities between working in a lab and cooking in a kitchen. I love to share my cooking experience with you and to inspire others to cook.

Tuesday, October 9, 2012

Banana bread


In true spirit of scientific exploration, I repeated this "experiment" twice. Slightly different sets of recipes but very different outcomes.

I am sure many home-cooks face this conundrum at some point in their "cooking exploration" and this is - "I followed the recipe and the instructions to the T but what I made, at best, did not match what I was looking for, or, at worst, was a complete disaster."

What went wrong?

Things that I learned from my experiment of making a banana bread, which applies to most cooking by the way -- first, the sequence of adding each ingredient is crucial, and second, not all recipes are created equal. Just because the recipe from this book or that website says so, it does not mean it is correct. I am not saying that these instructions are wrong but what I am saying is that very often it takes a few explorations to find the right recipe.

I wanted a FLUFFY banana bread but the first recipe that I tried did not give a FLUFFY banana bread. It came out more like a fresh bagel. Where did the FLUFFINESS go?

If you have been following this blog, you will know by now that I am a big fan of David Lebovitz. He was a pastry chef for many years and I have used his recipe or the recipes he uses and was able to replicate success routinely.

I used his Banana Bread recipe and gave some minor tweaks.


                                              surface of Mars
Ingredients:
A) Wet ingredients
2 tbsp melted butter (which is cooled to room temperature prior to using. You want to do this first before you start assembling the rest)

2 large eggs
3 very ripe bananas, mashed
1/2 cup of greek yogurt (Lebovitz asked for sour cream. I don't eat sour cream and I don't like to buy sour cream just to use half of it and have the other half sitting in the refrigerator)
1/2 tsp vanilla extract

B) Dry ingredients

1.5 cups of flour
1 tsp of baking powder
1/2 tsp of baking soda  (the baking powder and the baking soda are essential for FLUFFY bread)
1/2 tsp salt
1 tsp ground cinnamon
3/4 cup sugar


                                              a canyon found on Mars

Instructions:
1. Preheat the oven to 350F.
2. Butter the 4-sides of a square baking pan and line the bottom with a "cut out" parchment paper.
3. Sift together the dry ingredients (minus the sugar) a few times. Mix in the sugar after the last sift.
4. In a large bowl, mix the wet ingredients
5. Make a well in the center of the flour mixture and stir in the wet ingredients.
(note: The mixture is chunky in the beginning but it will smooth out slowly. David Lebovitz stresses the importance of "stir until just combined, but don't overstir: stop when any traces of flour disappear.)
6. Transfer the mixture into the pan and bake the cake.
(note: Don't wait for 40 minutes, as Davd Lebovitz suggested. Check the cake around 20 minutes and use the empirical test that David Lebovitz suggests which is "until the center feels lightly-springy and just done. For me, it took just under 30 minutes).
7. Let it cool then serve. 


This banana bread was definitely FLUFFY. Like most pastries or bread, this is best consumed when it is hot. The fragrance of baked, warm banana filled every inch of my apartment and it smelled like I just walked into an orchard with just-ripe fruit ready to be harvested at the most delicate moment.

There are so many variations of this cake such as adding nuts, chocolate chips, berries, citrus, etc.  I am already thinking about my next banana bread.


Saturday, September 22, 2012

Lemon Posset


I can't think of any dessert that is simpler than this. No baking, no beating, no blending, and no kneading.

I came across this dessert at www.food52.com/recipes/3060_lemon_posset  and the first thing that caught my eyes was the simplicity of the recipe.


Ingredients: (6 medium servings)

2 cups of heavy cream (sounds like a lot per serving, right?! you just need to get over the thought)
2/3 cups of sugar
5 tablespoons of lemon juice (about 2-3 large lemons).

Instructions:
1. Boil the cream and sugar for 5 minutes. (Quizz of the day: why some recipes call for boiling the cream, while some strictly request simmering the cream?)

2. Adjust the sweetness and the sourness with sugar or more lemon juice according to your own preference.

3. Let the mixture cool for 10 minutes.

4. Pour the mixture and divide evenly into ramekins/glasses/cups.

5. Refrigerate for a couple of hours.


Something magical happens in the end. This is where chemistry takes place. This is where food molecules, in its essence, transform. Breaking down of the fat with rigorous boiling plus acid from the lemon juice, follow by chilling the mixture, turn liquid into semi-solid.

There are many ways to eat lemon posset. Some people might choose to eat it "plain", but think about lemon posset as a blank canvas or white paint. You can combine it with many things and it should taste good. The first thing that came to my mind was graham crackers and the reason was simple -- I happened to have unopened graham crackers.

Further magic happens in my mouth.


The tanginess of the lemon posset was beautifully balanced by the sweetness of the graham crackers and the silky smooth texture of the lemon posset was countered by the coarse crumbly graham crackers.

A spoonful of lemon posset and graham crackers in my mouth sent me briefly to a very happy place.

3 ingredients, 1 step.  How much more easier can it be?


Thursday, September 13, 2012

Indian Style Cream Spinach (Palak Paneer)


This is a very popular indian dish that I discovered last year. As much as I love this dish when I first had it, I have only had it twice at the same place. Since I rarely cook Indian food, I thought it would be interesting to take on the challenge of recreating the flavor.

I will be lying if I told you I made Palak Paneer, because I didn't use any Paneer (cheese) in my dish. I didn't bother looking for it and I thought the flavor of this dish will not be diminished by the omission of cheese. Correct me if I am wrong.

There are many Palak Paneer recipes on the internet, they range from very complex to mildly complex. I picked a recipe which is pretty easy to follow.

http://www.indiansimmer.com/2010/07/palak-paneer-for-my-birthday.html


                                                          Fennel Seeds and cloves

Here I copied the recipe from the website:

1 pound fresh green spinach
8 oz packet of paneer cut into cubes (I did not use this)
1 cup red chopped onion (1 onion)
1 cup tomato pureed (3 large tomatoes)
3-4 cloves garlic
1 1/2 inch ginger
2-3 thai green chili (I did not use this)
1 tsp fennel seeds
3-4 cloves 
1/4 cup heavy cream 
2 tbsp coriander powder 
1 1/2 tsp curry powder
3 tbsp olive oil/cooking oil (I used regular peanut oil)
Salt 


                                                     Coriander and curry powder


Instructions:
1. Blanch the spinach for 30 seconds, remove from the pot and drain off excess water.
2. Instead of using a blender, I chopped the blanched spinach. 
3. Cook the onion, ginger and garlic for 1 minute.


4. Add the coriander, curry powder, fennel seeds, and cloves.
5. Mix all together and cook for a minute.
6. Add the pureed tomato and cook for 2 minutes.
7. Add the chopped spinach.


8. At this point, the tomato will release all its juice. Turn the heat to medium and slowly cook the juice down to a thick paste. 

9. Add the cream into the mixture. The amount is entirely up to you. 
10. Serve


There is no good way to photograph palak paneer since it is a meshed up spinach in cream  color. Not pretty, so I added sliced tomatoes to add color to the composition. 

In terms of recreating the flavor, I think I was 70% close to what was looking for. The flavors of the curry powder, coriander powder, fennel and clove is bold and intense. This intensity is balanced by the spinach and the tomatoes. Since I added the cream little by little, I was able to control how heavy I want the dish to be. Overall, I am very happy with what I made and it is definitely something to keep in my arsenal of recipes.

Tuesday, September 4, 2012

Peach Tart


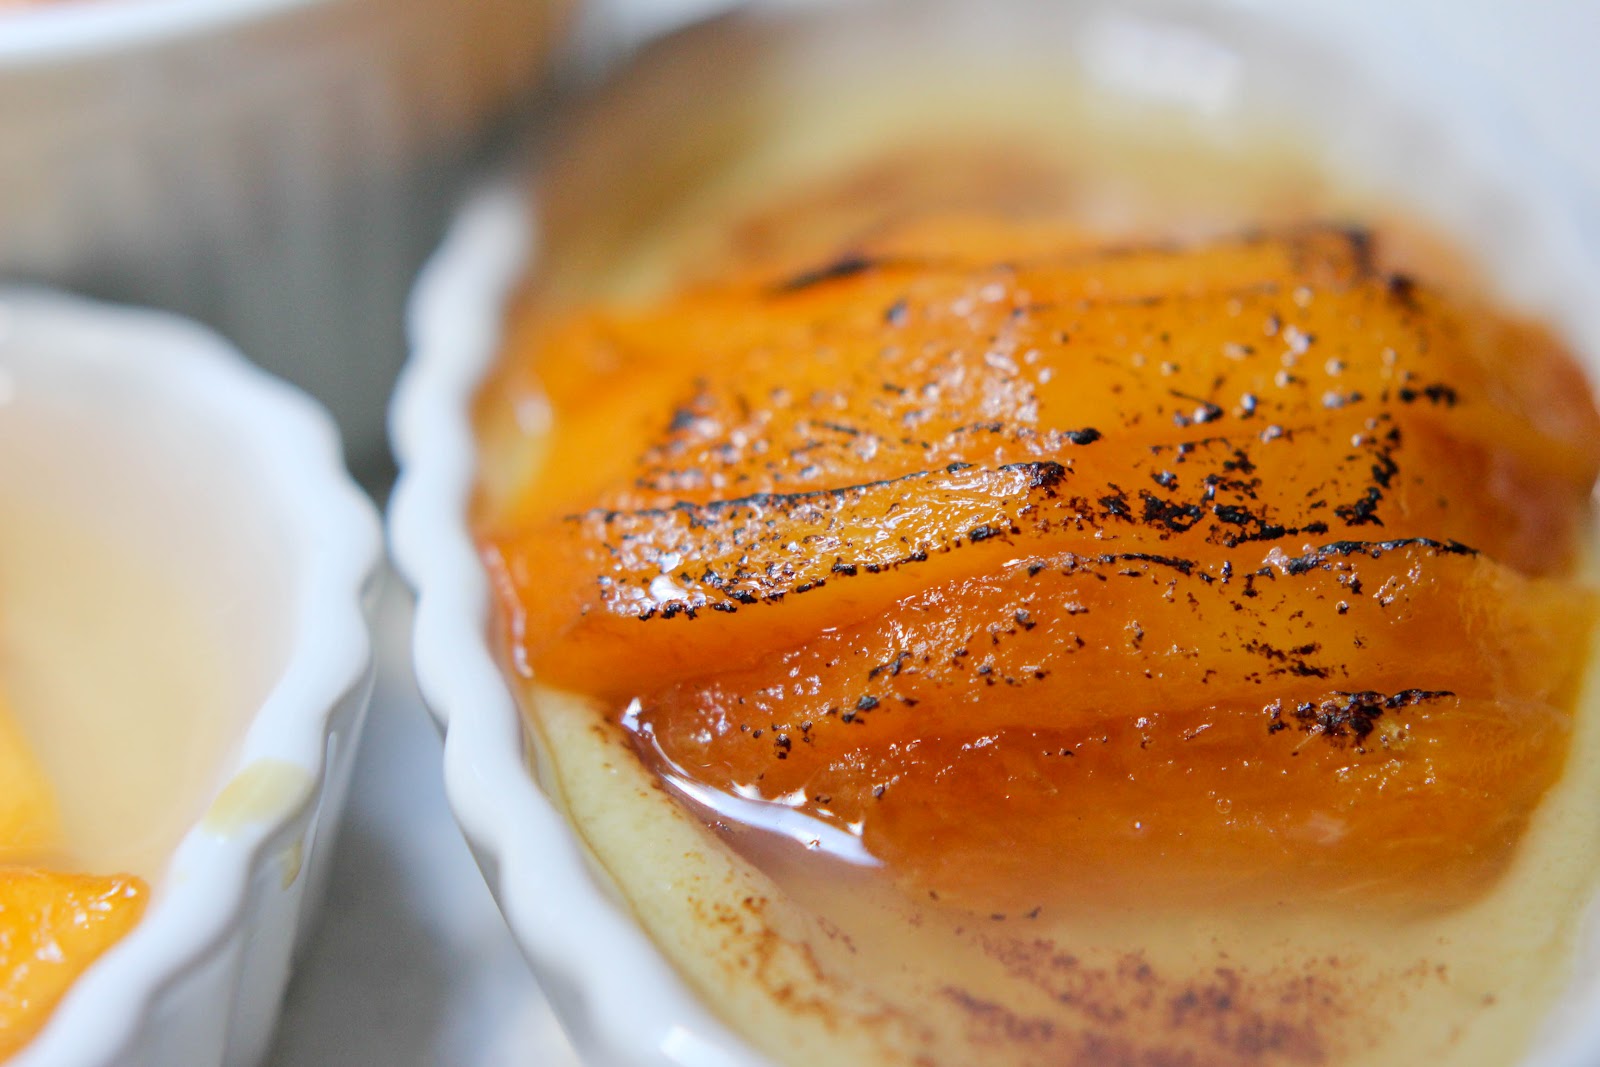
I bought a box of peach from Costco and decided to make a dessert with it. One dessert that I saw over and over again in various blogs is peach tart. Since I do not have the necessary skill (yet) to make a tart, I decided to make a "tartless" peach tart. Let's just call this a "ramekin" tart. For the base, I decided to use the recipe for making creme brule.

http://foodmolecule.blogspot.com/2012/08/creme-brule.html


The final step is to simply slice the peach and lay it over the creme brule. In a last minute decision, I made poured agar gel over the peach to give it a glossy look.


Note:
1/2 cup water, 1/4 tbsp of agar powder, plus sugar

Friday, August 24, 2012

Baked Salmon


I bought 2 pounds of salmon fillet recently and decided to cook this piece of salmon 5 ways! The only feasible way of doing this is by baking it. I have never baked fish before and so it was a good opportunity to learn a new skill. After a quick look into my pantry, I came up with these 5 combinations:

1. Dried fennel seed and lemon
2. Crushed raw almond and dried red chilies
3. Cumin and Coriander powder
4. Fresh garlic and ginger
5. Dried Rosemary and thyme


Instructions:

1. Preheat the oven to 425F.
2. Place a sheet of aluminum foil at the bottom of a baking pan.
3. Arrange the fish on the baking pan and use a brush to apply a thin layer of oil over the fish.
4. Season the fish with crushed salt and fresh ground pepper.
5. Place the ingredients accordingly on the fish.
6. Bake the fish for 10-15 minutes.

I forgot to place the aluminum foil at the bottom of the baking pan. This caused my fish to stick to the bottom of the pan and when I lifted the fish up, they broke into pieces, which you might be able to detect in the photos bellow.


The crushed almond and red chili was my least favoriate. The almond, though provided texture, did nothing in terms of flavor. The chili, however, did provide a nice kick. I will use more chilis in the future and combine it with something else, say Garlic and Ginger, which was the dominant smell in my kitchen when I baked these salmon.


The fennel seed and lemon was "okay". Again, the taste of the fennel seed did not transpire. Either I used low quality fennel seed or I didn't use enough fennel seed. However, can't go wrong with lemon flavor on a piece of fish. My favorite is the cumin and coriander Salmon just because I like dishes with heavy flavor. I have lost count of the number of times where I pan-seared fish with cumin and coriander.


The winner


Wednesday, August 15, 2012

Pan Fried Flat Rice Noodle (Char Kueh Teow)


This is my absolute favorite dish in the world. If I am stranded on an island and a genie can only  bring me the same food every day, this is the dish I will get.

I have scouted every restaurant in the city that serve char kueh teow but none were able to satisfy me the way this noodle satisfies me back home.

Feeling frustrated and a little home sick, I have decided to make char kueh teow and I am not ashamed to point it out right now that the char kueh teow that I made is the best I have tasted in NYC.

One of the main challenges of making char kueh teow is getting all the ingredients and prepping them.  The second main challenge is the cooking method. Wok on high heat. There is no alternative. None.

I adapted my recipe from http://rasamalaysia.com/char-kuey-teow/2/ and I have to give most the credit to this site. There are some detail instructions and tips on this site that I strongly suggest that you follow. I will highlight places where I digressed and modified.

Here we go...

Ingredients (2 servings)
1lb. of fresh flat rice noodle
8 shelled shrimp
1.5 chinese sausages, slice diagonally
Big bunch of fresh bean sprout, wash thoroughly
4 stalks of scallion, green part only, cut into 2 inches length
3 gloves of garlic, chopped finely
2 whole eggs

Sauce 
5 tablespoon soy sauce
1.5 tablespoon dark soy sauce
1 tablespoon sugar
Pinch of salt
Pinch of white pepper powder


Instructions (the sequence of adding each ingredient is essential, it is best to cook char kueh teow one serving at a time)

1. Prepare the mise en place http://en.wikipedia.org/wiki/Mise_en_place. Make sure you have all the main ingredients ready before you start cooking.


2. Mix the sauce together and set aside.
3. Heat 2-3 tablespoon of oil in a wok, set the fire to high.
4. Add half the garlic and stir it for 10 seconds.
5. Add the half the chinese sausage and the shrimp. Cook with the garlic for 30 seconds. Followed by half the chinese bean sprout then half the noodle.


6. Add 2.5 tablespoon of the sauce into the work and stir to mix well.


7. Push the noodle to the side of the wok and crack an egg directly in the middle of the wok.
8. Move the noodle over the egg and wait for 15 seconds.


9. Add half the green scallion and stir the noodle to mix everything well.
10. Serve immediately.


11. Repeat step 3-9 for the second serving.


I absolutely absolutely ABSOLUTELY love what I made. Again, I give much credit to rasamalaysia.com for providing the detail instructions.  From the very first bite to the very last bite, everything spells "home" and "yummy". I had a big satisfaction smile on my face as I enjoyed it. Elation!

I was fortunate to share this dish with a couple of friends and they loved it. I did not add the chili paste, it is optional.  I also did not add the cockle clams because I don't like it. Good luck finding it in north America.


Tuesday, August 7, 2012

Creme Brule


This is one of those desserts that has been sitting in my head for years and never gotten around making it until now. Everyone knows this dessert and it requires no introduction. I had my first Creme Brule at Le Cirque and the experience etched deep into my memory.

A friend gave me a blow torch (thanks SC) recently and the final piece of the puzzle has arrived. It is time to make creme brule.

I used Le Cirque's recipe as a reference and the original recipe can be found here http://www.foodandwine.com/recipes/le-cirques-creme-brulee. As usual, I made some slight adjustments.

(The original recipe is for 8 servings but I decided to reduce it to 2 servings since I am making it for the first time, but as you will see, even when I reduced the servings to 2, I still ended up with 4 creme brules)


Ingredients: (4 servings)
1 cup of heavy cream
splash of vanilla extract
small pinch of salt
2 whole eggs (I will explain this later)
5 tablespoon of regular sugar
Brown sugar for glazing


Instructions:
1. Preheat the oven to 300F.
2. Warm the cream and salt to gentle simmer.
3. Mix the eggs and the sugar completely.
4. Pour the warm cream into the egg/sugar mixture slowly.
5. Add the vanilla extract.
6. Strain the mixture.
7. Arrange the ramekins in a water bath.
8. Transfer the egg mixture into the ramekins
9. Cover the arrangement loosely with a foil
10. Bake for 1 hour.
11. Once the creme brule cools down, cover the top of the creme brule with a thin layer of brown sugar and flambĂ© the sugar.


This is the very first flambe that I tried and as you can see, the result is not good. It took me about 4 tries to finally discovery the secret for a perfect caramelized sugar crust. Unfortunately, I did not take a photo of that.

As noted above, the original recipe called for EGG YOLKS ONLY but I accidentally use whole eggs instead. Guess what, there was no detectable difference between using whole eggs and egg yolks only. Yes, I made both kinds!!

Most recipes call for eating creme brule when it is at room temperature but for me, it is best when it is WARM. FRESH OUT OF OVEN WARM!